

Key Takeaways
- Successful composting requires balancing "green" nitrogen-rich materials with "brown" carbon-rich ones.
- Proper aeration and moisture control are the two main factors that prevent bad odors.
- Most kitchen and yard waste can be composted; meat, dairy, and oily foods should be excluded.
- Finished compost can be ready in as little as 8–12 weeks with regular turning.
- Homemade compost significantly improves soil structure, drainage, and nutrient content.
What you will need
Why Composting Is Worth the Small Effort
Compost is often called "black gold" by gardeners — and for good reason. A regular supply of homemade compost improves nearly every aspect of soil health: it loosens dense clay, helps sandy soil retain moisture, and delivers a slow-release feed of nutrients that synthetic fertilizers can't fully replicate. If you've been wondering what kind of soil your garden actually needs, adding compost is the single most versatile improvement you can make regardless of your starting point.
The barrier for most homeowners isn't knowledge — it's the fear of smell, mess, or attracting pests. The good news is that a well-managed compost pile produces almost no odor and is rarely a pest problem. The key is understanding two simple categories of material and keeping them in balance.
Compost bin or tumbler
Contains materials, retains heat, and keeps pests out during decomposition.
Garden fork or compost aerator
Used to turn and aerate the pile, which is essential for odor-free, fast decomposition.
Kitchen countertop compost pail
Collects food scraps indoors before transferring them to the outdoor bin.
Garden hose or watering can
Used to moisten the pile when it becomes too dry.
Browns vs. Greens: The Only Chemistry You Need to Know
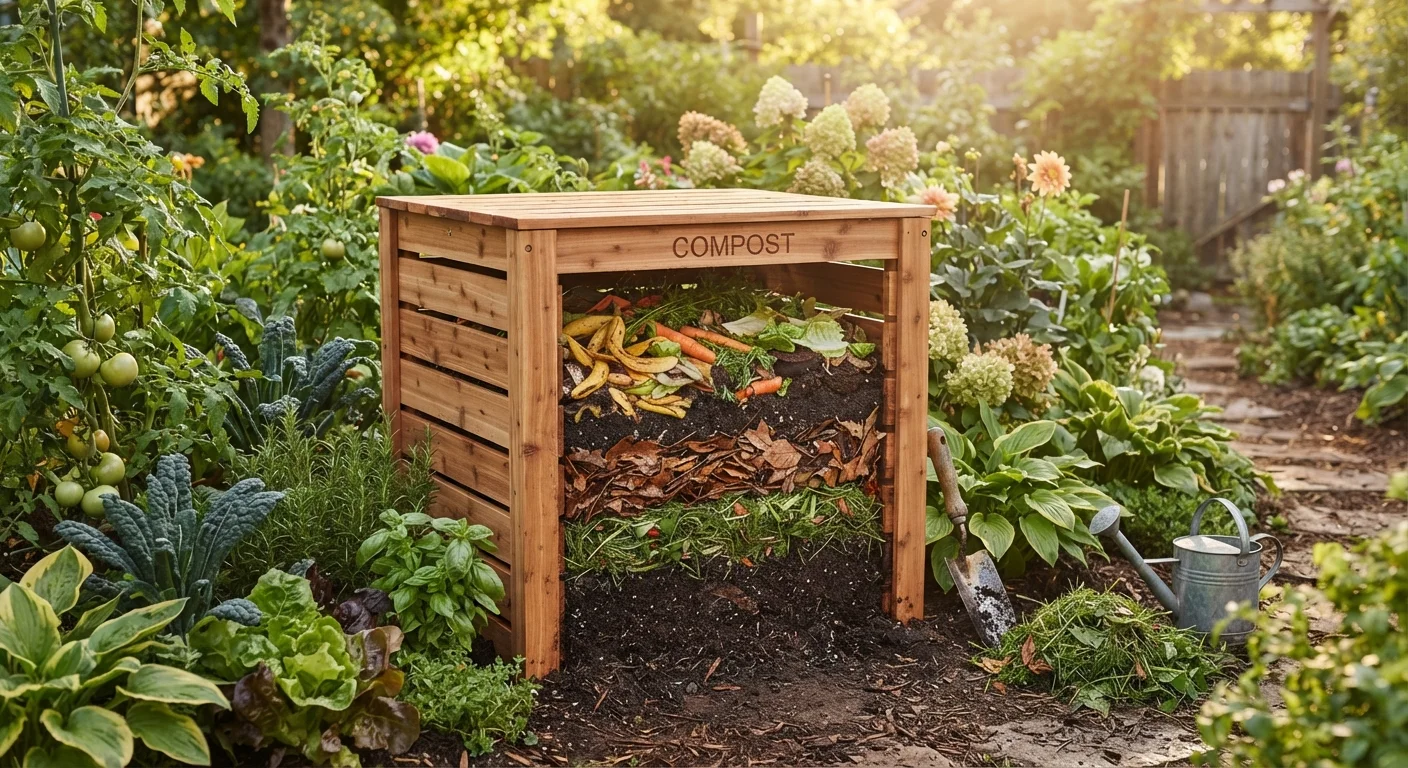
Every composting guide boils down to one concept: the carbon-to-nitrogen ratio. "Brown" materials are carbon-rich — dry leaves, cardboard, straw, paper bags, wood chips. "Green" materials are nitrogen-rich — vegetable scraps, coffee grounds, fresh plant clippings, and grass. Microbes need both to thrive. Too much nitrogen (greens) produces ammonia and odor; too much carbon (browns) slows decomposition to a crawl.
A rough 3:1 ratio of browns to greens by volume keeps the process balanced, aerobic, and nearly odor-free. You don't need to measure precisely — experienced composters eyeball it and adjust based on how the pile smells and looks.
Never Compost These Materials
Meat, fish, bones, dairy products, and oily or cooked foods should never go into a home compost pile. These attract rodents and pests, create persistent foul odors, and do not break down safely in a backyard system. Pet waste and diseased plant material should also be kept out, as they can introduce pathogens into your garden.
Once your compost is ready, it pairs beautifully with the kind of soil preparation described in our guide to starting a vegetable garden from scratch, giving young plants an immediate nutrient boost.
Step-by-Step: Setting Up and Running Your Compost System
Follow the steps below to set up your bin, build the pile correctly, and maintain it through to finished compost. Most of the work happens in the first setup; after that, maintenance takes roughly 10 minutes a week.
What you will need
Choose and position your compost bin
Select a spot that gets partial sun and has good drainage — avoid areas that pool water after rain. A level, slightly shaded location helps maintain steady moisture without overheating. Place your bin directly on bare soil so earthworms and beneficial organisms can enter naturally. If you're using a tumbler, a level hard surface works fine.
Start with a brown base layer
Begin every compost pile with a 4–6 inch layer of coarse brown materials: dry leaves, straw, wood chips, or torn cardboard. This base layer improves airflow at the bottom and prevents the pile from compacting. Browns are carbon-rich and are the structural backbone of your compost.
Add green materials and maintain the ratio
Layer nitrogen-rich "green" materials on top: vegetable and fruit scraps, coffee grounds, fresh grass clippings, and plant trimmings. Aim for roughly a 3:1 ratio of browns to greens by volume. Too many greens without enough browns is the most common cause of a smelly pile. Good green additions include:
- Vegetable peels and cores
- Coffee grounds and paper filters
- Eggshells (technically neutral but beneficial)
- Fresh garden weeds that haven't set seed
- Tea bags (remove staples)
Check and adjust moisture
Your pile should feel about as moist as a wrung-out sponge — damp but not dripping. Squeeze a handful: if no water comes out and it crumbles, add a little water. If it's soggy or smells, add dry browns and turn the pile. Proper moisture supports microbial activity without creating anaerobic conditions.
Turn the pile regularly
Use a garden fork or aerator to turn the entire pile every 1–2 weeks, moving material from the outer edges into the center where temperatures are highest. Turning introduces oxygen, which feeds aerobic microbes — the ones that break down material efficiently and without bad smells. More frequent turning means faster finished compost.
Recognize and use finished compost
Compost is ready when it looks dark and crumbly, smells like earth, and you can no longer identify the original materials. This typically takes 8–16 weeks depending on materials, temperature, and how often you turn the pile. Finished compost can be worked into garden beds, used as a mulch layer, or mixed into potting soil. For best results, let it cure for an extra two weeks before applying it around edible plants.
Speed Things Up With a Simple Trick
Chop or shred materials before adding them to your bin. Smaller pieces expose more surface area to microbes, which dramatically accelerates decomposition. A handful of finished compost or garden soil added to a new pile also introduces beneficial microorganisms that get the process going faster.
A healthy garden starts beneath the surface. If pests appear once you begin amending your beds, our guide to dealing with common garden pests without reaching for chemicals first walks through effective, low-intervention approaches.
Watch Your Moisture Levels
A compost pile that is too wet will turn anaerobic — meaning it breaks down without oxygen — producing the sulfurous, rotten-egg smell most people associate with composting. If your pile smells bad or looks slimy, add dry brown materials and turn it immediately to reintroduce air.